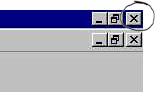
The top line (which is
dark blue) will show  . This shows the name of the programme and the
filename. The name "Document1" is given to the file until you give it a
different name. For example if you were typing a Fractions Test and called it
"Fractions Test1" it would look like this: . This shows the name of the programme and the
filename. The name "Document1" is given to the file until you give it a
different name. For example if you were typing a Fractions Test and called it
"Fractions Test1" it would look like this:  . .
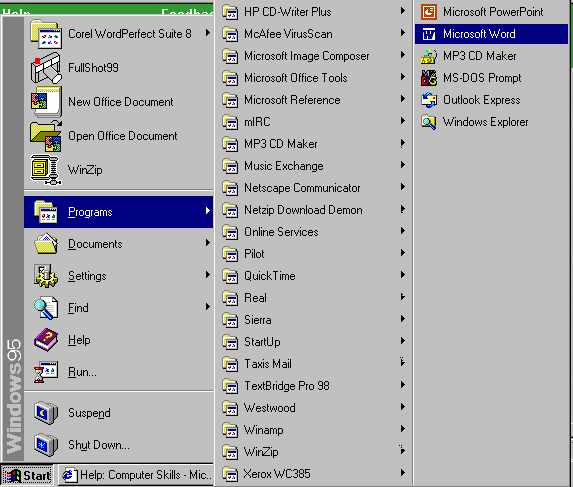
The next line shows various menu options.

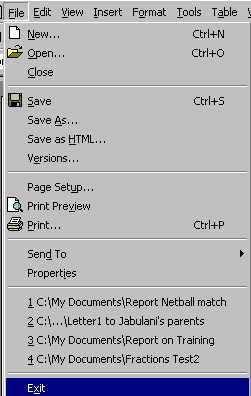
When you click on a word a menu is "pulled down". For example if you
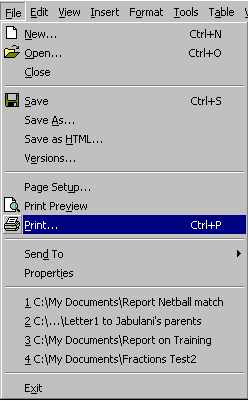
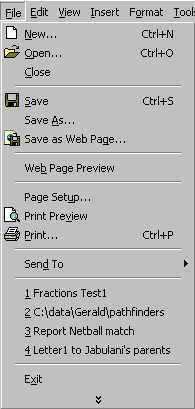
click on "File" the File Menu will pull down as follows:
Notice how some options in the file menu correspond with icons on the toolbar below the
menus (icons to the left of the words). For example, to open a file you could click on File
Open, or you could click on the yellow icon  in the
toolbar that does the same thing. You have a choice of which method to use. in the
toolbar that does the same thing. You have a choice of which method to use.There is another option. You will notice on the right-hand side of the
file menu that there are keyboard shortcuts that perform certain functions. For instance,
if you wanted to open a file you could use the keyboard shortcut instead of the file menu
or the icon (see previous paragraph). Notice that the keyboard option is Ctrl-O.
In other words, you press the Ctrl key, keep it
pressed down and with the other hand you press the O key once. |
 |
The standard toolbar looks like this:

These are various tools that you could use. All offer shorter ways of doing things than
using one of the menu options (as has been explained in the previous paragraph). Place the
mouse pointer  over
these buttons (also known as icons) and you will see what they are used for. over
these buttons (also known as icons) and you will see what they are used for.
Below the standard toolbar is the formatting toolbar.

These icons are tools that are used to change the appearance of text on the page.
You type your document in the big white space on the screen.
|
At the bottom of the screen you will see a
status bar

This provides information about your position in the document (page number, line
number etc). |